To add a new Exchange calendar do the following:
- Right click on the list with calendars.
- Select “New Calendar”
- Select “On the network” followed by the “Next” button.
- Select the “Microsoft Exchange 2007/2010” radio option followed by the “Next” button.
- Enter the “Name” for your new calendar. This will be shown in the calendar list. Choose a color, If you wish to have item alarms active and you can choose a e-mail identity but is not necessary followed by the “Next” button.
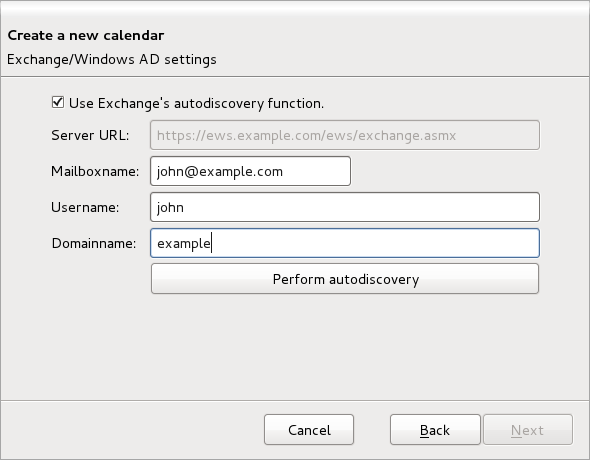
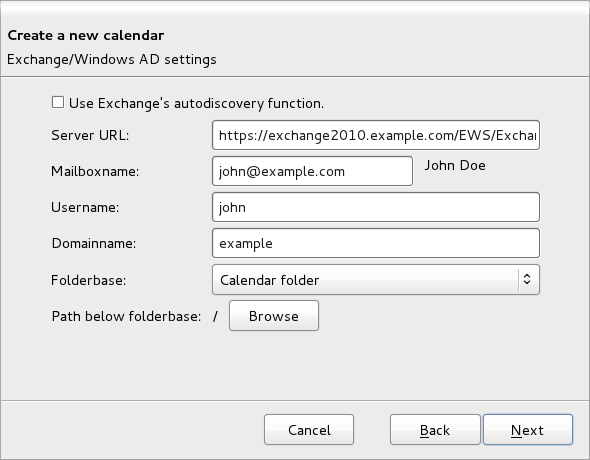
- Try autodiscovery, if you do not know the right Server URL, or enter the right Server URL. Normally this is in the form of https://<hostname>/ews/exchange.asmx (e.g.: https://exchange2010.example.com/ews/exchange.asmx)
- Enter the Primary SMTP address into the mailboxname. If you do not know the Primary SMTP address enter one of your email alias addresses. The add-on will ask exchange for the Primary SMTP address.
- Enter your windows username. In the format of <username> or also <username>@<full domain> if you are using version 1.7.12 or higher of the add-on.
- Enter the windows domainname of which your username is part. Ask your IT department for this info if you do not know it.
- Now press the button “Perform Autodiscovery” or “Check server and mailbox”.
- If everything is all right you will get two extra fields to specify or an error telling what went wrong.
- If an error appeared correct the error and retry.
- Select the folderbase. Exchange saves calendaritems and tasks into folders and these folders are saved into a tree like hierarchy. The folderbase contains a list of entrypoints into this tree. Select the right entry point from where you want to set the path to the right folder. “Calendar folder” is de default personal calendar for the selected mailbox. The “Tasks folder” is de default personal tasks folder for the selected mailbox.
- Select the “Path below folder base” specifies the path to the folder to use based from the previous specified folder base.
- If all is all right click on the “Next” button to create your new calendar or task-calendar.


